Trekking: Nepal vs. India

Tuesday, October 20, 2009

With the risk of pissing off some partisan, hardcore Himalayan trekkers, I’d have to say that Nepal and India offers the best treks in the Himalayas. The other countries sharing the Himalayas have spectacular places and mind-blowing scenery as well, but trekking in Bhutan is a bit expensive, Pakistan and Afghanistan have some security issues to sort out at the moment and travel in Tibet lacks the freedom to explore without government interference.

This leaves these 2 countries. So which is best for trekking, Nepal or India?

Trekking Service : Nepal vs. India (1-0)
Trekking in India is often a more lonely experience than trekking in Nepal. Which can be good or bad, depending on what you want. For beginners, Nepal is definitely easier if you go to one of the 3 well-established trekking areas: Annapurna, Everest and Langtang. You’ll still have to do some serious high-altitude walking, but there will be lodges on the route and typically more trekkers to run into and chat with. This eliminates the need to carry your own food and camping gear, and independent solo treks is not as dangerous when there are more people around, even if they are strangers (risk of getting lost, immobilized by accident).

Camping treks : Nepal vs. India (0-1)
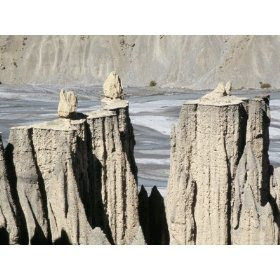
However, if you prefer to go completely remote on a camping trek, India is just as good as Nepal, if not better. Places like Ladakh and Himachal Pradesh (esp. between Manali and Dharamsala) in north-west India has some fantastic routes that really takes you into some very remote and wild parts of the Himalayas. I guess this is a bit like trekking in Nepal in the 1950’s, before the tourist discovered it and the Nepalese started catering to trekkers.

High-altitude trekking : Nepal vs. India (1-0)
At 18,200 feet (5550 meters), Kala Pattar in Nepal’s Everest area is one of the highest “easy-trekking” peaks in the world. Some of the high passes in the same area (Cho La, Renjo La and Kongma La) reach almost the same height. And the Thorung La pass on the Annapurna Circuit (5400 meters / 17,700 ft) is probably the highest mountain pass in the world with that many trekkers passing over each year – it’s ten’s of thousands! But the show doesn’t stop there. So many other high-altitude trails in Nepal, but at 6000+ meters, it’s starting to turn into mountaineering. To mention just one, Mera Peak at 6476 meters (21,247 ft) is still classified as a trekking peak. Going to India, trekking trails can still easily be found over 5000+ meters. I don’t know if I’d call the Stok Kangri Peak (6123 m / 20,080 ft) a ‘trekking peak’, it’s definitely challenging but easier that other 6000+’ers in the area. Think I’ll have to give the point to Nepal on this one because of the relative ease of “normal” trekkers reaching 6000+.

Cheap Trekking : Nepal vs. India (0-1)
When it comes to prices, both countries are relatively cheap to be trekking in. Guides and porters (“Sherpas”) can be hired for 10-20 dollars per day. (A little note: Don’t underpay these guys. They are doing a tremendous job. And pay extra if you require special skills and experience.) It’s my feeling that Nepal is a bit cheaper for normal trekking, but going into certain areas requires hefty fees in Nepal. Dolpo and Mustang trekking fees used to be minimum 1000 USD per person, now somewhat lower. I don’t much care for these extortionist fees, which is why I’ll give India this point.

Trekking Safety: Nepal vs. India (0-0)
Nepal used to have a Maoist insurgency raging, but that ended in 2006. Even then, trekkers were never really targeted except for “donations” (involuntary, but not too hefty). The highest trekking risks in Nepal are from landslides, avalanches and plane crashes. Bus / jeep accidents and thieves are other things to watch out for. It happens, but not much. Comparing to India, hmm… I don’t have exact statistics, but taking the total numbers into account, don’t think there is much difference here. Roads and airfields are probably a bit better in Inda than in Nepal, but it’s my feeling that crime is higher in India. Certainly, in the upper part of the notorious Parvati Valley, one needs to fare with caution. Nepal or India? Split decision on this one.

Conclusion : What’s best, Trekking in Nepal or India? : Final Score = 2-2!
Sorry, I can’t proclaim a general winner here. So many factors make up a great trek: Good weather, view of snow-capped peaks, cultural encounters, high-altitude landscapes, good food, friendly people, diverse trails… Both India and Nepal have all these. Think I’ll just say that trekking in India is a bit more wild, whereas trekking in Nepal is a bit easier to arrange and complete. It’s up to you to choose which you prefer!

Check these guide books for all the info you need to plan and execute your trek. Maps, route descriptions, formalities, bus connections, getting there, best deals etc. It's all there. Brand new 2009 editions of the Lonely Planet guide books!

Best Sleeping Bag for Himalaya Trekking

Sunday, October 18, 2009

You can't put a price on a good night's sleep! You’ll be kicking yourself for skimping out when you are trying to sleep in high altitude, but shivering the whole night. A good sleeping bag will keep you warm, comfortable and safe, so your body is able to function properly the next day. In case your sleeping bag is slightly under-rated for the conditions you are in, you can use a liner (bag inside bag) / sleep in your thermal underwear / cover the bag with your down jacket to boost your insulation. (Just don’t put a heavy blanket on top – it squeezes all that nice insulating air out of your sleeping bag.) But the main point here is that you find the best sleeping bag for what YOU want to do!

How warm do you need your sleeping bag to be?
Use a sleeping bag that will keep you warm during the lowest possible temperature you expect on your trek. What that means in the Himalayas is typically a rating between -10 to 32 degrees Fahrenheit (-23° to 0° Celsius). No need to over-do it, just get one that’s warm enough. The extra warm sleeping bags are just heavier to carry (and/or more expensive), so just figure out what you need. Some sleeping bag hints below:

How cold does it get in the Himalayas?
Our atmosphere has what meteorologists call a 'lapse rate' of 6.5°C per 1000 meters (3.5 Farenheit per 1000 feet). In plain speak, that means that when you walk a further 1000 meters (vertical) up a mountain, the temperature drops about 6.5 degrees. So if it's a comfortable 25°C at sea level, it will be -1°C up at 4000 meters. (That's 77 F to 30 F going from sea level to 13,000 ft.) These numbers, I should say, are just average numbers and there will be much variance throughout the day and from one place to another. It's not exact, but it gives a general idea about how much temperature change with altitude, assuming you don't change latitude/longitude or go beyond the summit of Mt. Everest. (Source: USA Today / Aerodynamics for Naval Aviators). So what does this mean in practice?

High passes around 5000 meters : In places like the high passes of Annapurna Circuit and the Everest Area in Nepal, the temperatures you get are typically at or a bit below freezing during the summer time (May - September) in the nighttime at this altitude. A -5C bag should be able to keep most warm. If you go in mid-winter (December – February), temperatures frequently go down to -20, -25° C during nighttime and your sleeping bag needs to be rated for these conditions. In the high-seasons between winter and summer (October-November & March-April), a -12 degree sleeping bag should do the trick on the high passes.

Trails around 4000 meters : A lot of treks in Nepal, India and Bhutan hover around this altitude, ideal for trekking with fairly “easy” conditions and spectacular scenery. You probably won’t need the toughest rated sleeping bag, but don’t be surprised to see a bit of ice on the trail and freezing nighttime conditions. Specially from October to April/May, depending on the exact locality in the Himalayas. Generally speaking, I’d prefer and recommend you a ‘minus 12 degree (Celsius)’ sleeping bag during mid-winter and a ‘minus 5 degree (Celsius)’ sleeping bag in the beginning and end of this period.

Trails around 3000 meters : A -5°C sleeping bag should be ok during the cold season, a +5 C sleeping bag sufficient during warmer season.

---------------------------------------------------------------------------------------------------------------------------------------------------------------

Down or Synthetic Sleeping Bag?
Down-filled sleeping bags have the best warmth-to-weight ratio which is important for trekking on foot. Less important if you’re going on a road trip and can throw it on top of a jeep. So for trekking in the Himalayas, down sleeping bags are the best way to go. They are also very compressible and have good long-term durability – they’ll work for years and years, making good on your investment.
:
:
:
:
:
:
:
:
:
:
:
Annapurna - Sleeping bag necessary?
For Annapurna and other ‘tea-house treks’ in Nepal (IE, not camping), keep in mind that typical lodge rooms are not insulated. When it freezes outside, it freezes inside. The lodge owners will provide you with a blanket, but in the winter season and in high altitude, it still gets pretty cold up there and you will need more than the blanket to stay comfortable and warm. Many trekkers on the Annapurna Circuit and the Everest Base Camp treks bring their own sleeping bags to be sure to stay warm – and to avoid getting filthy and bed-bug infested blankets that has been used many times before, without a wash.
---------------------------------------------------------------------------------------------------------------------------------------------------------------

Best Sleeping Bags for Trekking in the Himalayas:
Having hopefully now figured out the temperatures you'll be experiencing on your Himalaya Trek, it's time to decide on a sleeping bag. Unfortunately it's not as simple as just looking at the temperature ratings, since some manufacturers tend to be optimistic and overestimate the warmth. But looking at the manufacturers, the weight and quality of insulation material used, I've found some solid options you can choose from here:

For COLD Conditions (-5°C):
-------------------------------------------------

Marmot Sawtooth
Weighs 1.4 kg (3 lbs)
Goose down (600+ fill)
Rated to +15 Fahrenheit (-9 °C)

Although rated for 15F, 20-30F seems more realistic, making it ideal for high passes in summer and many typical treks year round.

Down collar, full-length double zipper, spacious mummy-design.


Eureka! Casper 15
Weighs 1.4 kg (3 lbs)
Synthetic material
Rated +15F (-9°C)

Holds out cold amazingly well for a synthetic sleeping bag this size and prize! Compresses well in stuff sack (included), although not as well as down. Can be used a bit below freezing point, but not -9°C as rating say. Perhaps with a good fleece liner...


For COLDER Conditions (-12°C):
-------------------------------------------------

Marmot Lithium
Weight only 1.2 kg (2.8 lbs)!
Goose down (850+ fill)
Rated 0 F (-18°C)

Very good goose fill factor and still super lightweight. Great for long treks on high Himalayan trails in all seasons except mid-winter. Editors Choice in Backpacker Magazine 2008.

North Face Elkhorn
Weighs 2.3 kg (5 lbs)
Synthetic
Rated 0 Fahrenheit (-18°C)

With a price of less than $100, it is an excellent choice, but not for -18°C as the rating says. Temperatures down to -12°C are still comfy.


For COLDEST Conditions (-25°C):
-------------------------------------------------

Marmot Col EQ
Weight 2.1 kg (4.1 lbs)
Goose down (800+ fill)
Rated to -20F (-29°C)

An amazing sleeping bag that will keep anyone warm in the toughest conditions. It is quite expensive, but if you are attempting icy and snowy high trails and passes in winter-time, this is a fantastic bag that will make your otherwise impossible trek possible!

Eureka! Eagle Point
Weight: 2.9 kg (6.4 pounds)
Synthetic
Rated to -15F (-26°C)

It's another two pounds of weight, it doesn't compress as well and it's temperature rating is a bit less, compared to the down bag. But the price of this Eureka! bag is about 1/10th of the Marmot down bag! It's the cheapest sleeping bag in this selection, and one of the warmest!


Sleeping bag liners
A liner (bag inside bag) is a good way of adding a bit extra warmth to any sleeping bag. And it allows you to be flexible: On the lowest parts of the trail, just sleep in the liner, on mid altitude sleep in your sleeping bag - on high parts of trail sleep in both! Check out these nifty ones:


And finally, whatever sleeping bag you get, if you plan on sleeping on the ground / in a tent, a sleeping pad is mandatory. Without it, you'll be pressing your body weight straight through the sleeping bag and effectively lying directly on the cold ground. The self-inflating Therm-A-Rest is just fantastic for this purpose. Everybody deserves one! Well worth the extra bucks. Only thing to consider here is if you want to save money or get the lightweight Therm-a-Rest. It's either 1½ or 2 pounds weight. See prices on the right.

Is the Therm-a-Rest really worth the extra pound or so, compared to a simple foam sleeping mat? I've tried both and I think so! But for the minimalist the Therm-a-Rest Z Lite Mattress might be a better option, weighing slightly less than a pound.

Enjoy your sleeping bag. And sweet dreams!

Related posts:


Best Trekking Stove for High Altitude Trails

Saturday, October 17, 2009

Bringing your own little camping stove on a trek in the Himalayas is a great way to trek more independently, to stay and eat wherever you want, and to go exploring the more remote parts where few others go. If you are crossing high passes over 4-5000 meters (~15,000 ft) you’ll probably be encountering lots of snow, so carrying your own camping stove has the added benefit of enabling you to melt snow for drinking water… If you get the right high-altitude stove, that is! Here’s a few tips on finding the best trekking stove for high altitude trekking:

Let’s agree on one thing first. A good cooking device for trekking in the Himalayas (beyond the guest-house trails) needs to…
1. be robust and reliable (it’s “mission-critical gear”),
2. work in high altitudes and freezing conditions (when you need it most)
3. and be fairly lightweight (unless you’ve got someone else to carry it for you).

In my eyes, everything else is of secondary concern: How fast does it burn? Does it make a noise? Is it environmentally friendly?... Sure – it’s all nice, but… First things first.

There’s plenty of primus options out there:
-
And for ultra-lightweight "stoves",
-


But when it comes to high-altitude use in Himalayan conditions, it usually comes down to either a Trangia or a MSR cooker. And that’s what we need here. Both the Trangia and the MSR (specially the XGK model) are well suited for Himalayan conditions. But which one is the best cooker for Himalaya, the Trangia or the MSR stove?

Primus: Trangia vs. MSR Cooker
I’ve used a Trangia since my days as a boyscout and still use one when I’m trekking in the Himalayas, occasionally over 5000 meters. For me, it just feels better and is more enjoyable to use. I’ve used a MSR cooker once in high-altitude (trekking with friends who insisted on MSR), but the damn thing broke down half way (4 days) into the trek – by a fumbling hand… Ok, we managed to fix it up again - it actually comes with spare parts !? – but that experience just made me more happy with my Trangia! Fair to say, that’s just my preference. Lots of trekkers use MSR all the time. I guess it’s just a question of getting used to working with it.

The MSR cooker does have some real advantages: It’s usually more lightweight, burns quicker and uses less fuel. (Note that the XGK model is the best MSR for high altitude.) But I’ll have to say that when it comes to reliability, the Trangia is unsurpassed in my eyes. You pour in fuel and light a match. That’s it! The MSR uses pressurized fuel running through a pipe, so you need to prime it and pump it up - which is also why it’s more noisy.

Another thing I love about my Trangia is the design – you open the self-contained system and use the outer part as a sturdy windshield. It has little holes in one side so you turn it toward a light wind or against a heavy wind to make sure the burner get’s just the right airflow. Very intuitive. The MSR on the other hand, uses a flappy little wind-wall that I suspect might fall down or even blow away in strong wind… Although I’ve never seen that happen.

Fuel for Trangia or MSR Cooker
The last point is the fuel. The Trangia uses liquid fuel that you pour into the burner and light it. The fuel is usually alcohol which has be denaturated (meaning methanol has been added to the ethanol to make it undrinkable. Thus also called “metho” / methylated spirits). Denatured alcohol is very cheap and readily available on most gas stations, in supermarkets and drug stores (isopropyl-alcohol, pain solvent…), it’s environmentally friendly and burns clean, although it doesn’t have as high warmth output per weight as other fuels (typ 27-30 MJ per kg), such as kerosene (43 MJ/kg) and gasoline (45 MJ/kg)

The MSR Cooker is pretty close to the concept of last century primus stoves which used vaporized kerosene as fuel. But the modern day MSR mini-stoves can use many other fuels such as unleaded gasoline / petrol, diesel, jet fuel and white gas. Can you use alcohol for your MSR? Probably… One thing I found slightly annoying about the MSR fuels were that I couldn’t easily see how much was left in the (metal) container…

Conclusion: Best trekking primus.
As you probably sense by now, I’m a bit of a Trangia fan myself. But to be honest, the MSR XGK is excellent as well. I’ll just advice you to get well acquainted with it before hitting the remote trails. So if you want the most lightweight, quickest and fuel efficient cooker --> go with the MSR XGK. And if what you want is the most easy to use, reliable and windproof cooker --> Go with the Trangia.


MSR XGK EX
Extreme Condition Stove

Weight: 0.5 kg

Not included:
Windscreen & heat reflector
cooking pots
handle
spare fuel bottles
and service kit.

Classic Trangia
27-5 Non-stick Stove

Weight : 0.8 kg
2 x 1-litre pot
1 x 18 cm pan

or get the larger
Trangia 25-5 UL Stove Set
Weight: 0.98 kg
1 x 1.5 L pot,
1 x 1.75 L pot,
1 x 22 cm pan

Or the lightweight
Mini-Trangia 28-T
Weight : 0.33 kg
1 x 0.8 litre pot,
1 x 15 cm pan


See with the Trangia set, you get the complete and ready-to-use set in one package. When you buy the fuel, just use whatever bottle it comes in. Now just don't forget the food and cooking / eating utensils!


Related posts:

Best Tents for Himalaya Trekking?

Monday, October 12, 2009

I’ve found that when I bring my tent on a trek and get into the more unspoiled parts of the Himalayas, it’s often these places that are the most interesting and memorable. Off the beaten track, I can cross uninhabited passes and get up in the uppermost parts of the high valleys. That’s just extraordinary, so the tent really takes my trekking experience to a whole new level.

Below you’ll find my recommendations for

  • Best 1 person tent for Himalaya trekking
  • Best 2-3 person tent for Himalaya trekking

Of course trekking in the Himalayas with a tent (and other camping gear) is a bit harder than going on one of the ‘tea-house treks’, but it’s also a completely different experience -- The exploratory nature, the feeling of self-reliance and the sense of accomplishment you get just makes a tremendous difference!

But there is a price to pay for this freedom: Weight. The good news is that with the Best Tents, specially selected for Himalaya Trekking, there are solutions to the weight and other issues you’ll encounter.

So what makes the best tent for Himalaya Trekking?

Besides weight, you need to consider things like stability, durability and weather-protection. It comes down to design and fabrics:

  • For the cold conditions of the high Himalayas, I would definitely recommend a 4-season tent (winter tent) over the more normal 3-season tents. Even when it isn’t winter! High up, it gets cold in the night and 4-season tents are warmer and better at keeping out the rain, wind and even snow / spindrift.
  • Remember, your tent should preferably be as light-weight as possible (affordable). Shaving a couple of pounds off your load will make a difference when you are crossing a 5000 meter / 17,000 feet pass where the oxygen level is close to 50% of sea-level!
  • PS: If you are using porters, ponies or plan to stay put in a base camp for a while, it’s another story. But when you are on the move and hauling your own load…
  • Dome, Tunnel or Geodesic design? Most of the time, honestly, it doesn’t really matter for practical purposes. But the dome design is usually higher, allowing you more easily to sit comfortably upright. On the other hand, the dome has a larger wind-profile, making it more fragile when camped on an exposed, windy mountain.

3 Best Tents for Himalaya Trekking:

Best 1-Person Tent
The “Assailant” from Sierra is one of the few really good one-person trekking tents out there. Easy to carry, at 3.3 pounds / 1.5 kg, it is fairly lightweight – at least not too heavy for a 4-season tent! And still more than 2 meter / 7 feet long, so fits almost anyone... Also fits a backpack inside the tent, which extends on the back-side., but no vestibules. Everything goes into the same compartment here. It can be hard to find, since one-person tents aren't used much in high altitude conditions, but if you find one of these you can really save some weight!


Best 2- and 3-Person Tents
I simply have to point to NEMO’s “Losi” tents as the best tent for trekking in the Himalayas. Personally, I’ve been using a heavier “version” of this tent (2 prs), but the NEMO’s are super light-weight, considering their size and the fact that they are all-season tents. Also, the NEMO’s use a double-wall system with two vestibules and they are quick to put up and comfortable to stay in. All this and still just around 5-6 pounds (2.5 kg)! Most other tents this size (and price) are 2-3 pounds heavier. There are cheaper options out there, but only if you are willing to carry the extra weight! If not, get the NEMO.


Related posts:

Treks out of Dharamsala / McLeod Ganj (Himachal Pradesh, India)

Saturday, October 10, 2009

Dharamsala /McLeod Ganj is one of 3 trekking hubs in Himachal Pradesh, the other two being Shimla and Manali. The towns of Dharamsala and McLeod Ganj, at about 1800 meters / 6000 feet are interesting places in themselves, exile of HH Dalai Lama and home of the exiled Tibetan government. The best description i’ve heard is that McLeod Ganj is a ” Buddhist monk zoo full of westerners engaged in losing/finding themselves/something else very significant”. However, I think you can also find the “real thing” in the spiritual department there.

As for trekking out of Dharamsala and McLeod Ganj, it’s all about the Dhauladhar Range located just north of the towns and the Pir Panjal Range a bit further north. Both these ranges are sub-ranges of the Great Himalayan Range. The treks you can do in these mountains are in the 4-5000 meter (13,000-16,500 ft) altitude range, typically takes 5 to 8 days and pose rather steep gradient trekking. If you have the time, you can combine 2 or 3 treks into one big circle, so you’ll get back to where you started via a different route.

The area (Kangra Valley south and Chamba Valley north of the Dhauladhars) literally has hundreds of interesting trails and passes you can trek. I can’t explain all of the trekking routes here, but I’ll mention some of the most popular and interesting ones, just to give you a taste and an overview of trekking around Dharamsala / McLeod Ganj. If you really want to explore the trails off the beaten track, I’ll suggest you get a copy of one of the following books, containing maps and more detailed route descriptions :


MAP TREKKING POINTS: (1) Dharamsala / McLeod Ganj, (2) Triund, (3) Inderhara Pass, (4) Minkiani Pass, (5) Chamba, (6) Chobia Pass, (7) Manimahesh Lake, (8) Kugti Pass, (9) Sari Pass. Click here to get the Google map that you can zoom and pan around on!

(1 & 2) McLeod Ganj – Triund/Illaqa. An easy and popular little trek / day-walk taking you up to a 2800 meters / 9000 feet ridge below the Dhauladhar Range. Great views up there on a clear day! It’s a 9 km trail with tea-houses on the way and a campsite (and sparse accommodation) on the Triund site. If you continue going up, you’ll reach the snowline at Illaqa (3350 m, 11,000 ft) after 4 km and the Lahesh caves (3500 m, 11,500 ft) after further 2 km. The caves can “house” up to around 20 people. But most people spend a night at Triund and then go up to Illaqa and back to McLeod Ganj next day. This trek is open all year round, but be prepared for a bit of snow/ice trekking in the coldest months.

(3) Inderhara Pass (a.k.a. Laka Pass and various spelling forms, Indarhara, Indrhara…) is one of more than 10 passes crossing over the Dhauladhar Mountain Range. It’s 4350 m (14,300 ft), so out of Triund / Illaqa (see above) you should be able to make it up and down in one day (no camping gear needed). From the Lahesh caves, it’s about 3 hours up the steep trail. The beautiful Nag Dal (Lake) is a bit north-west of the pass. Crossing over into Chamba Valley will take 4-6 days. The Inderhara Pass is closed down most of the time between November and April.

(4) Minkiani Pass ( / Minikiani / Manikaran…), neighboring the Inderhara Pass (see above), but 100 meters lower (4250 m, 14,000 ft). Takes about 5 days to cross over, from Dharamsala into Chamba Valley (Donauli). On the trail up to the pass on the southern side is the Kareri Lake (previously glacial lake, now seasonal) and 5 km east of the pass (northern side) is the Lam Dal Lake (3900 m), the biggest lake in the Dhauladhar Mountains, about half a mile across! You can’t access it directly from the pass, but from the campsite below the pass (northern side), it is a beautiful little side-trip! The local Gaddi shepherds use this pass often but as late as May it can still be challenging due to snow/ice conditions. Or fun, if you have the proper gear!

===============================================================================
About Crossing the Dhauladhar Range:
Generally speaking, the south side trails are quite steep, the passes are closed by snow during winter and the north side has large boulders and moraine. Lots of fun! There are also several streams that become small rivers during the monsoon, making it hard to cross them at that time. There are more than 10 passes over the only 50 km long Himalayan sub-range. From west to east, they are : Belani Pass, Minkiani Pass, Gaj Pass, Inderhara Pass, Kundli Pass, Toral Pass, Talang Pass, Shinghar Pass, Waru Pass and Jalsu Pass. You are best equipped if you bring simple camping gear and, in the colder months, snow/ice trekking gear on almost all passes, although sometimes it is possible to complete a trek staying only in caves at night. Guides are recommended for beginners not familiar with trekking and the area, but not always needed. For treks in the Pir Panjal, I will recommend hiring a local guide at all times.
====================================================================================

(5) Chamba – main town in Chamba Valley and Chamba District. It is road connected with Dharamsala in the Kangra Valley below and serves as a road-head in and out of the Chamba Valley, with it’s many trail-head villages…

(6) Chobia Pass, just short of being a 5000 meter pass (4965 m / 16,300 ft), this trail can take you from Chamba into Lahaul and one of the world’s highest highways. The trail start around Brahmaur (road connected to Chamba) and as it steeply ascends and moves into glacier-land, there can be small crevasses to look out for. It’s a long and hard route for the experienced trekker, and you should not attempt without a local guide to show you the way.

(7) Manimahesh Lake in the Pir Panjal Range, 4080m, close to Manimahesh Kailash (5656m, virgin peak, ascents forbidden), very holy, pilgrimage tours in Aug-Sep (Jatras), motorable road goes to Hadsar (2280m), up 13 km streneous, steep trail along Manimahesh Ganga, Dhancho Village halfway has shelter all year, during pilgrimage more places. Also trail from Holi. Manimahesh = Shiva’s Jewel.

(8) Kugti Pass, 5040 m (16,500 ft) is another way of trekking from Dharamsala - Chamba Valley into Lahaul - Kullu Valley. Some trekking trail it is though! Should take you about a week, crossing the glaciers and possibly sheltering in natural rock caves… Like with the Chobia Pass (#6 above), this trail is not for newbies and requires a guide.

(9) Sari Pass, 3760 m (12,300 ft) is relatively easy (compared to #6 and #8 above). It makes an interesting alternative route between Manali and Dharamsala, through one of the most interior areas of the Western Himalayas. It’s best done with some elementary snow/ice trekking gear, as you will be going up/down along a small glacier.

Related posts:

Treks out of Shimla (Himachal Pradesh, India)

Monday, October 5, 2009

Shimla town is one of 3 trekking hubs in Himachal Pradesh, the other two being Manali and Dharamsala / MacLeod Ganj. In itself, Shimla (2100 m, 7000 ft) doesn’t have much trekking spirit, but I have enjoyed eating good food, cake and coffee on the Mall in Shimla! Trekkers need to stuff themselves when they can, you know!

You can do a number of good treks out of Shimla, both short 1-2 days treks and other week long treks to the interior of the Himalayas. The good news is, you can do much of this as a spectacular road trip! (bus, jeep, motorcycle, bicycle!). For once, in the Indian Himalayas, there are accomodation / hotels along the route and you are able to travel independently without a guide, getting up around 4000 meters / 13,000 ft. If that’s not enough, you can pick up your camping gear and put on your hiking boots and then trek into the high altitude landscape from the roadside villages, getting up over 5000 meters / 15,000 ft!

The bad news? Well, the road isn’t exactly like a US Highway. At places, it’s nothing more than a gravel wheel track being constantly washed away by rock and landslides! Considering the altitude though, it’s pretty impressive that there is a road here in the first place!

MAP TREKKING POINTS: (1) Shimla, (2) Narkanda, (3) Jalori & Bashleo Passes, (4) Sarahan, (5) Sangla Village in Sangla Valley, (6) Chitkul, (7) Reckong Peo / Kalpa, (8) Kaza, (9) Kunzum Pass. To zoom in on map details and pan around, click HERE.

The following treks out of Shimla can basically be divided into 3 categories : Day trips from Shimla (1-3), Sangla Valley treks (5-6) and Spiti Valley treks (7-9). All places can be reached by road and short/long treks can be done from there.

1. Short treks out of Shimla (1-2 days). The Shali Tibba (2900 m, 9500 ft) is the highest peak close to Shimla. There is a fantastic view from the top and you can do the whole trek in one day. 13 km out of Shimla is Chharabra (3000 m, 10,000 ft) and Mashobra Bazaar from where you can walk around and make your way back to Shimla, also in a day.

2. Narkanda (2700 m, 9000 ft), located some 60 km from Shimla, is the base of an amazingly beautiful day trip to Hattu Peak (3400 m, 11,000 ft). Expect a bit of snow here during winter.

3. Narkanda is also the base of treks over the Jalori Pass and the Bashleo Pass heading into the Kullu Valley (where Manali is). Both passes are about 3500 meters / 11,500 ft. There is a jeepable road over much of the Jalori Pass and a number of small lodges / tea-houses over the Bashleo Pass, allowing you to trek without camping gear. 5 km east of JP is the Saryosar Lake, also worth a look! The two passes can be combined into a little circuit trek.

4. Sarahan (2300m, 7500 ft) is a picturesque 800+ year old village located in the Sutlej Valley. Worth a stop-over on your way to either Sangla Valley or the Kinnaur-Lahaul-Spiti Valley. There is an old Bhimakali temple that was once the site of human sacrifice and the surrounding hills are great for easy day treks.

5. Sangla Village (in Sangla Valley). The valley goes up along the Baspa River, the village is in about 2600 meters / 8600 ft. From here there are many high altitude treks that goes into the mountains south of the valley, some of the most famous being the Rupin Pass (4500 m, 15,000 ft), the Buran Pass (4700 m, 15,500 ft) and the Nalgan Pass (5000 m, 16,500 ft). This is where it is time to get your camping gear out and do some very exciting trekking!

6. Chitkul (3300 m, 10,800 ft) further up the Sangla Valley is another nice village still connected by road. It’s nice in itself but again, if you don’t mind a bit of “real” trekking and camping, there are some amazing places to go from around Chitkul. Follow the river up to its source and see / cross the Lamkhaga Pass (5300 m, 17,400 ft), then trek down to Harsil and round to Jamnotri.

7. Reckong Peo / Kalpa (2800 m, 9000 ft) is where you need to stop and get your inner line permit from the tourist office. You are now in the Kinnaur region and it is also the base of the amazing Kinnaur-Kailash Circuit/Parikrama Trek that crosses over the 5250 meter / 17,200 ft Charang La and down to Chitkul (#6 on this list). The Kinnaur-Kailash trek takes about 5 days this way. August-Septemer are the best months to do the trek.

8. Kaza (3600 m, 12,000 ft) in the Lahaul-Spiti region is where most people tend to stop and stay for the night before proceeding to Ki Gompa, Kibber Village and perhaps beyond… The area, landscape, scenery here… just mind-blowing!

9. Kunzum La (4250 m). Amazingly, state run busses also cross this pass. But it is the highest point on the route so it is the first place to close down in the fall and the last to open up in the spring. Consider bringing gear for snow-trekking to avoid backtracking a couple of days in a bus. It happened to me once. Pass closed. Turn the jeep around or cross the snowy pass? I opted for the first one since I hadn’t brought any snow gear. But I remember a couple of guys just setting out on foot… That would have been interesting!

-----------


These were some of the best treks out of Shimla. There’s plenty of other trekking options in the area around Shimla and if you are interested in doing any of these treks, I’ll recommend getting one (or both) of the following books. They have plenty of detailed maps and more route suggestions.

Feel free to add to the suggestions about trekking out of Shimla by commenting below. Thanks and Happy Trekking!

Related posts:


"The Bible" when it
comes to exploring
the Kinnaur & Spiti
region. For those of
us who are inflicted
with the travel bug.

Best treks around Manali (Himachal Pradesh, India)

Saturday, October 3, 2009

Nestled in the Himalayan foothills at around 2000 m (6000 ft), the little town of Manali is one of 3 trekking hotspots in the Indian state of Himachal Pradesh (the other two trekking hubs being Shimla and Dharamsala/McLeod Ganj) - and yes, they all serve Western food, pizza, coffee etc:-) There’s plenty of good treks around Manali and into the surrounding area, with incredible mountain scenery, mountain lakes, high altitude passes etc. The full nine yards of trekking!

In fact, there are so many trekking options around the Manali area that it can be a bit confusing to choose where to go. But first thing you need to know is that the treks out of Manali are either day trips or camping trips. There are not really any reliable guest houses on the trekking trails, so unless you are lucky and get to crash in a farmers house or goat herders hut, you’d better bring a bit of camping gear.

Before we have a look at the treks around Manali, take a look at this map (GoogleMaps) showing the terrain. Just look at those valleys and mountains! Manali is right there in the upper half of Kullu Valley, just before the Himalayas really take to the sky!

MAP TREKKING POINTS: (1) Manali in Kullu Valley, (2) Bhrigu Lake, (3) Beas Kund, (4) Rohtang Pass, (5) Parvati Valley, (6) Jagatsukh and “Chander Tal” lake (the small one), (7) Hamta Pass, (8) Chander Tal Lake (the famous one), (9) Pin-Parvati Pass. Click HERE to zoom in and pan around on this map!

Note that the map points dotted in here are not exact. Good maps of the area are hard to come by. You can still use the old maps with ridge lines (rather than contour lines). Get them here:

Or you can get the new Lonely Planet guide book for the Indian Himalayas (5th edition, 2009) and copy the maps from there. (That would be my option.)

Treks around Manali
If you have a map, nothing can stop you from just heading off and exploring the area on short treks, returning same night. Don’t be lazy! It’s a beautiful area around Manali, so do some exploration! Also good as warm-ups for longer treks. But the real trekking around Manali only starts when you are ready to take a couple of nights out in the open! So get that tent and sleeping bag, and there’ll be nothing between you and the stunning mountain area! Here are some of the best places to go around Manali:

1. Short treks around Manali, some well known points of interest around Manali would be the: Vashist Hot Water Springs, just 3 km out of Manali, across the Beas river is this idyllic village with natural sulfur springs. The Nehru Kund, a natural little water spring, 6 km from Manali. You can also stroll down the valley to Jagatsukh village 6 km down along the river. The Solang Valley, 14 km from Manali, has ski slopes in winter and is a popular picnic spot in summer. Nice views all year round! And the Rahala Waterfalls, 16 km out of Manali, about 2500 m (8000 ft)

2. Bhrigu Lake, 3-4 days trekking from around Manali, you’ll be going up to an altitude of 4250 m (14,000 ft) to this stunning mountain lake and its holy waters.

3. Beas Kund, a holy, glacial lake at 3700 m (12,000 ft), the origin of the Beas River. This is one of the most popular and beautiful treks out of Manali. Also an ideal place for acclimatization for higher altitudes and as a base camp for climbing the nearby Shitidhar and Friendship Peaks, both about 5300 m / 17,300 ft. Expect snow here until April.

4. Rohtang Pass, (a.k.a. Rohtang La / Rohtang Jot) drivable by road from Manali, this 4000 meter (13,000 ft) mountain pass is pretty impressive… but not open all year around. The Rohtang La usually opens up in May and stays that way until September/October or so.


5. Parvati Valley, lush and green valley with a couple of small resort villages, Kasol and Manikaran, the last one being famous for its hot springs and, unfortunately, infamous for drugs and crime. It is possible to do a one-day trek from Malana Village (near Manikaran) over the Chanderkhani Pass to Nagar (on the road to Manali), but it will be a long day, ascending from 2650 m to 3650 m to 1450 m. Malana is a quite obscure little village, you may not want to stay here if you are too sensitive!

Is Malana / Parvati Valley safe to trek?
Good question! Do a Google search for “Parvati Valley crime” and you will find stories about tourists disappearing and even getting killed! Likely related to drug use and perhaps not relevant if you are trekking through the area. But beyond Manikaran, I’ll advise you not to trek alone under any circumstances.

6. Jagatsukh and “Chander Tal” lake, source of some confusion. There are actually two lakes named “Chander Tal”. This one is probably NOT the one you have heard about, it’s about ¼ size of the “real” Cander Tal, #8 on this list. Still beautiful though!

7. Hamta Pass, very scenic trek over the 4250 m / 14,000 ft Hamta Pass. From Manali you can either end it at Chatru (road connected village with some accommodation) or continue into the Lahaul Spiti area. In fact, this was allegedly the way to enter Lahaul/Spiti before the road was built.

8. Chander Tal, a.k.a. the Moon Lake. Very beautiful, “magical” spot at around 4250 m / 14,000 ft. Out of Manali, you can take a 4WD or jump on a bus(!) to Batal and then trek up to the lake. Or drive to Kunzum Pass and trek down to the lake! Should be possible to reach in one day, but since you’ll probably not be able to get back same day, make sure you are acclimatized for 4000 meters before going from around Manali, at 2000 meters. You’ll also need to cross the Rohtang La (#4), usually closed due to snow from September to May. If you are in private/rented jeep, there’s also a rough road going all the way to the lake.Driving down the Kunzum Pass close to Chander Tal. Click image to order as poster!


9. Pin-Parvati (Parbati) Pass, this is a really interesting and long trek. Expect to take about 2 hard weeks for this one! But worth every effort! After crossing the 5300 m (17,400 ft) pass (west-to-east), you’ll be in the Spiti Valley with a completely different landscape and an ancient Buddhist culture. They have some out-of-this-world monasteries here: Tabo, Ki gompa, Dhankar and Kibber village. And the good thing is: You don’t have to walk back. Spiti Valley has a reasonable good road and you can actually catch a bus taking you back to the Manali area!Rock / earth pillars in Spiti Valley, east side of the Pin-Parvati Pass. Click image to order as poster!


I have personally stayed and trekked several weeks in this Manali area. And specially spent time in the Spiti Valley. Would love to go back again, and I think my choice (out of Manali) would be first the Beas Kund trek (#3) and then the Bhrigu Lake trek (#2). Spend some time in both places for acclimatisation. And then the big one, the Pin-Parvati pass (#9)! That would be my dream trek around the Manali area, taking about one month to complete (I don’t like to rush it). Some day…

Pre- vs. post-monsoon? I’d think early post-monsoon (July-August) would be best, as the snow shouldn’t give too much problems that time of year.

If you are doing any of these (or other) treks around Manali, let me know how it went! Use the blog comment option right here below. Thanks...
"The Bible" when it comes to exploring the Kinnaur & Spiti region. For those of us who are inflicted with the travel bug.


Related posts:

Snow / Ice Trekking Tips

Sunday, September 27, 2009

Trekking on snow and ice can be a blast! – But it can also be challenging and sometimes dangerous. During winter treks, while crossing over high passes or any other snow and ice trekking scenarios, proper preparation is key to ensure your safety and comfort. For the full story on snow / ice trekking, have a look at the book (right) by a Canadian guy called Montague Alford. Among other things, he describes how to make your own little can-candle stove to melt snow for drinking water. Excellent stuff!

Ok, let me just start with some essential warnings. Heed them, but don’t let them scare you away. Trekking in snow/ice over the high passes in the Himalayas is well worth the effort!

7 warnings about trekking in snow/ice (essential tips)

1. Bring food
. Both non-emergency energy bars in your pocket and real-emergency stuff somewhere else. Just in case you have to spend a forced night out in the open somewhere. And keep the emergency food for when you need it, don’t munch it all down before normal dinner…

2. Stay hydrated. Dry winter air will dehydrate you quickly without you noticing until it is too late. You won’t find much running water in sub-zero conditions. You need to carry water with you or melt snow.

3. Wear warm clothes. Obviously, you don’t want to get frost bite on your toes or fingers, you don’t want to shiver.

4. Protect yourself from the sun. The UV rays are strong up there during days with sunshine. Sunscreen and sunglasses are essentials!

5. Don’t go to the edge. Edge of snow – could be a cornice, a snow drift extending out over something/nothing! Edge of ice – could break and you’ll fall into icy water.

6. Don’t go alone.

7. Keep an eye on the weather.


That was the quick, important essentials of snow / ice trekking. The following is less essential tips that might help you have a more comfortable and enjoyable trekking experience.

16 tips about trekking in snow/ice

1. Kick step
. When walking up in soft snow or ice, you can kick your boots into the snow/ice to create steps and footholds.

2. The “Herringbone Technique”
. Instead of pushing your boot directly into the snow, step sideways to get a little more of the shoe into contact with the snow.

3. Use your heels
. When descending on snow / soft ice, flex your ankle so the toe is pointed up and step down hard on the heel.

4. Switch backs
. On steep ascends and descends, cross left-right-left-right rather that going the direct way. Makes the route effectively less steep.

More tips about gear for snow / ice trekking:

5. Hiking Boots / Mountaineering Boots / Snow Boots. Your boots are very important. They should have waterproof outer shells such as oiled leather or, ideally, plastic. Stiff plastic snow boots are the best for snow and steep icy trails, but they are heavy to carry around when you are not in the snow. The second best is hard mountaineering boots compatible with crampons. With normal hiking boots your feet will invariably get wet after some time in the snow, as the warmth from your feet escapes and melts the snow on your boots. Gore-Tex hiking boots helps with the water problem.


6. Crampons / YakTrax. Slightly annoying to take on and off, but not more technical to use than roller skates. Crampons adds extra weight, but for steep and extended icy trails, specially if there is a long fall underneath you, proper crampons can be worth considering. Ultimately they can save your life! Like any footwear, make sure it fits. For crossing glaciers and snow, the flexible crampons are better than the rigid ones for technical climbing.

Alternatively, a set of YakTrax - essentially lightweight crampons NOT intended for mountaineering, - might be better than nothing. But also check point 7 and 8 in this list.


7. Trekking Poles / Snow-Ice Poles. A lot simpler than crampons and I would say using trekking / snow poles is the bare minimum you need for icy trails. Trekking poles add extra balance points and additional power. They are invaluable in icy conditions. It’s good to be able to adjust your poles when you are traversing a hillside, so get telescopic poles. Use the short pole on the uphill side and the long pole on the downhill side.

You can get a decent pair of trekking poles for $30 and up. But for the Himalayas, I'll recommend you to get a trekking pole with an ice axe! What a brilliant idea!! Check it out --->


8. Ice Axe. Another substitute (or addition) for the crampons is the ice axe. It is probably more useful than the crampons if there are only very short tricky sections. You can use it to cut steps in the ice and in case you loose balance and start to slide, use it to self arrest. That is, stop your fall! Straight shaft axes are the best for glacier travel, bent shaft axes for dedicated climbing.

You may want to go with a trekking pole on the downhill side and an axe on the uphill side. You need to learn to use the ice axe though. If not sooner, try asking other more experienced trekkers on the trail about how they use it. In the end, the axe can save your bacon!


9. Gaiters. When you’re walking in snow, knee-high gaiters can keep the snow out of your boots and therefore help to keep your feet drier and warmer. Gaiters also add another layer of material around your lower legs to help keep them warm. Some trekking trousers have build in gaiters that extends over your boots, see the post about trekking trousers to find them.


10. Sunglasses. Not just for looking cool (although they help in that department as well), but at high altitude the UV light is a lot more intense and your eyes need protection. This is specially true when trekking in snow / ice. The snow reflects pretty much all the light and without proper protection, snow blindness is a serious risk.

Additionally, your sunglasses should have side shields to avoid incidental light exposure. Sunglasses should always be worn, even when the sky is overcast as UV rays can pass through clouds.


11. Warm clothing. Self-evident, really. Since you are reading this, chances are that you'll encounter cold air and cold wind, so you'll need to be equipped to keep all parts of your body warm, at all times. Be sure to include a spare pair of gloves to change, if the primary gloves get wet. For more, check the warm trekking clothes guide here.

Other tips for snow / ice trekking:

12. You can keep your water bottles from freezing in your pack by putting them in a wool sock or insulated bottle cover.

13. I’m not sure if it is just a myth, but some people say that water mixed with flavor powder will freeze at a lower temperature than plain water. Perhaps try it in your freezer – and let me know the results!

14. Another little trick is to turn your water bottles upside down so that any ice forming in the bottle will be in the bottom of the bottle instead of in the opening.

15. And to keep your boots from freezing at night, put them in a stuff sack (you can use your sleeping bag stuff sack) and put them inside your sleeping bag at the foot end of the bag. If there’s not enough space, at least put your boot insoles in the bag.

16. And the final piece of advice, use a trekking guide if you are crossing over a high mountain pass in snow/ice conditions! Specially if you are not experienced. You don't want to get lost in the snow!

-------------------

As with a lot of other things in life, "the more you put into it, the bigger the reward is!" Snow/ice trekking requires some extra effort, but the outdoor world in its frozen state can take you into a new realm of pleasure where you can enjoy silence, solitude, and a mind-blowing landscape that will redefine "white" in your mind! So get them winter boots and trekking poles now, and start preparing your next trek for the fourth season! Snow / ice trekking is a blast! Have a look around this site for the best high altitude snow treks, such as Everest and Annapurna. Happy trails!

Suggestions for further reading about snow / ice trekking tips :


Related posts

Everest Routes, Descriptions & Map

Saturday, September 26, 2009

OVERVIEW: On the Nepal side there are basically 4 trekking routes around Everest – all of them absolutely world class treks! Generally speaking, all routes start in Namche Bazaar (3440 m / 11,300 ft), accessible by 1½ days walk from the airstrip in Lukla (2900 m / 9,500 ft) or by walking in from Jiri (1900 m / 6000 ft). Walking from Jiri takes about 9 days + a days drive to the trailhead, while flying in from Kathmandu to Lukla only takes about ½ hour – the choice is yours! It’s also possible to cross over the high passes to connect the different routes at the top, rather than having to return same way you came.

Crossing either of the high passes : Kongma La, Cho La and Renjo La is not too difficult when the conditions are good. You do need to be in good shape, acclimatized, well hydrated and be used to walking on steep scree though. In case there is snow or ice on the trail, it’s a different story altogether. Still doable, but be properly prepared for the more severe trekking conditions. It is fantastic routes! Snow and ice is exceptional during the main seasons, but common from December to March. Check the post about snow / ice trekking tips for more info on how to prepare yourself. And there's more detailed route descriptions of the high passes below.

Here is a map I drew up of the different trekking routes in the Everest region. It is intended to give an overview only, not to be an exact trekking map. But for planning purposes, I actually think it is pretty useful. I’ve also plotted in some of the most talked about locations that you’ll probably spend a lot of time talking about when going there.

Everest Region map: Green lines = The 4 main routes. Green dotted lines = The 3 high passes. Yellow dots = Trekking peaks. Yellow stars = Climbing peaks. Red dots = Important villages.

Everest Main Routes Descriptions:

Route 1 : Nangpa Glacier
The least traveled route of the 4. Ultimately, it leads to the Tibetan (Chinese) border point at Nangpa La, at 5716 m, 18753 ft. You'll be passing through Thame village on your way, and if it's May, try and catch the interesting Mani Rimdu Dance Festival there!

Route 2 : Gokyo Trek
There are some beautiful lakesup in the Gokyo area. Stunning turquoise waters, at least when they are not frozen in January/February. You can also walk up to the nearby Gokyo Ri, a 5357 meter / 17,575 feet ridge with excellent views of the entire area, Everest included (although farther away from E. than from KP, arguably better view!). Also don't miss upper Gokyo valley - going to the 4th, 5th and 6th lake (“Scoundrel's view”) and finally the lakes nearer to Cho Oyu base camp. It is a beautiful walk on a good trail can and it can be done as a day trip from a lodge at Gokyo 3rd lake.


Route 3 : Everest Base Camp (EBC)
Let’s face it. Everyone here wants to get close to the BIG E, the mother of all mountains, the roof pillar of the world: Mt. Everest. Or Sagarmatha as it is called in Nepalese or Chomolungma / Qomolangma as it is called in Tibetan. For the best view of Everest many trekkers actually skip the base camp and head up to Kala Pattar (KP) in stead. There’s great views from KP and it is not a technical climb to get up there. But at 5550 m / 18,200 ft, it requires good lungs and warm clothes! You can also do both KP and EBC on the same trek, the two places are not that far apart, both being about half a days walk from Gorak Shep and back.

The main attraction of going into the base camp is perhaps to see the Khumbu Ice Fall up close – and perhaps hang out with expeditions getting ready for their summit attempts, most notably in April/May. Sometimes though, the summiters cordon off parts of the area since they are afraid that you carry diseases into their camps! Still, you can have a look…

In and out of Lukla, the Kala Pattar / Everest Base Camp trek typically takes about 2 weeks.


Route 4 : Island Peak / Imja Tsho
Stunning side valley going east-west, surrounded by peaks and glaciers. It's also the way to Island Peak from where you probably have the best view of Mt. Everest all together! But Island Peak is a bit tricky. First, you need a permit from Kathmandu. Second, some previous experience in alpinism / mountain climbing is strongly advised, although you can get training on location the day before. (You’ll be using crampons, ice axes and rope.) And third, you need a guide and some gear. Can be arranged locally sometimes, but you can’t count 100% on finding what you want / need.

Island Peak aside, you can also "just" walk up to the viewpoint on Chhukhung Ri for the jaw-dropping view of the Lhotse south-face. Lhotse in itself is the second biggest mountain in the region (and 4th in the world). But its impressive south face rises 3.2 km (1.98 mi) in only 2.25 km (1.4 mi) of horizontal distance, making it the steepest face of this size in the world. Legends have been born here, legends have ended here (Tomo Cesen, Jerzy Kukuczka).

Everest High Pass Routes Descriptions:

Route (1-2) : Renjo La High Pass
Stunning views on this high pass. Most easily done from east to west: Gokyo - Renjo La - Lungden. No technical skills required in good conditions, but the western side is steep and exposed, so can be snowy and icy when cold. If you can’t see the trail when descending to Lungden, keep as much to the left as possible, avoiding the big rocks and boulders. Can be done in a (long) day’s walk. Going from east to west, the altitudes across are : 4750 m – 5345 m – 4400 m (15,600 ft – 17,500 ft – 14,400 ft).

Route (2-3) : Cho La High Pass
Probably the toughest of the 3 high-passes in the Everest region mentioned here. You might need mountaineering experience and equipment if the conditions are any less than ideal. Going from the Lobuche side, you only have to ascend the steep rocky ledge to reach the glacier while going from the Gokyo side, there is a long scree ascend exposed to falling rocks. You don’t want to spend too much time there so again, the route is easiest from east to west. The altitudes across are (east to west, Dzongla - Cho La - Tarnak) : 4830 m - 5420 m - 4730 m (15,800 ft - 17,777 ft - 15,500 ft).

Route (3-4) : Kongma La High Pass
Some beautiful turquoise lakes up there. Going down towards Lobuche, keep right (up from Lobuche, keep left!). Relatively speaking, the Kongma La pass is not too difficult in good conditions. But mind you, you'll be spending the whole day between 15,000 and 18,000 feet, so make sure you are well acclimatized! Estimated trekking time : 8-9 hours at best. The south-east to north-west direction seems the easiest one: Chhukung - Kongma La - Lobuche. Roughly 10 km on the map, altitude 4730 m – 5535m – 4930 m (15,500 ft - 18,150 ft - 16,200 ft).

-----------

If you have the time, by all means, just do all the Everest routes! I know I could easily spend a whole month or more exploring the Everest region, if I had the time. There's so many interesting little side trips and trails that run in parallel. You may have to make a tough choice though, depending on how much time you have. To help you plan your Everest trek and get as much out of the time you have as possible, here's some helpful resources you can get. Well worth a few bucks to get a map and perhaps a book stuffed with detailed side route descriptions :


Related posts, stuff you need:
Happy trekking!


.
.